So when we last left off, the board looked like this:

The next step is to get it looking more like the right side of this board:

Removing the old shellac is pretty simple, though a little messy. If you're lucky, you can go right from removal to finishing your boards, which was our plan... that fell through. More on that in a minute.
Anyway, tools you need are:

1. Denatured Alcohol, the solvent for shellac.
For more information on shellac, check out this Wikipedia Article.
2. Rubber or latex gloves.
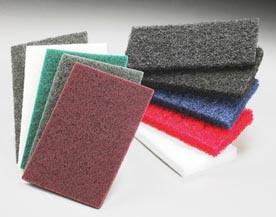
3. Steel Wool or Synthetic Steel Wool
4. A bowl (doesn't matter the size, though it might be nice if it had a tight lid).
5. A rag (any rag).
Get your gloves on. Pour some alcohol into the bowl and dip the steel wool in. I bought synthetic steel wool for the first time on this project, and I must say, I like it a lot better than the real thing. For one, I don't have to worry about metal shavings ending up in my wood. Also, I don't like the feel of it. Though I can touch it unlike my mother-in-law who wouldn't even stock it at the hardware store she used to work at. I don't think she or I are alone in our distaste for steel wool.
Anyway, back to the process after a lengthy diversion.
Begin scrubbing the wood with the steel wool dipped in alcohol. When the alcohol gets too cloudy, pour some new stuff in your bowl. When the boards start to take on a dull appearance, the shellac is off.
Now, this is where we were going to go ahead and refinish. What we didn't count on was a stain below the shellac. This stain, while removing the old shellac, became blotchy. After reading about fixes for blotchy stain and trying talk ourselves into liking the look, we gave up and decided to sand all of the boards down to get rid of the blotchy stain.
So, stay tuned for sanding and finishing!


No comments:
Post a Comment